How to Use a Hand Planer: A Step-by-Step Guide for Beginners
How to Use a Hand Planer: A Step-by-Step Guide for Beginners
Woodworking has always been a craft that rewards patience, skill, and attention to detail. While power tools like table saws and routers have their place, there’s something uniquely satisfying about using hand tools to shape and refine wood. One of the most fundamental and versatile tools in any woodworker’s toolkit is the hand planer. Whether you’re smoothing a surface, adjusting the thickness of a board, or creating a perfectly flat edge, the hand planer is essential. In this guide, we’ll dive deep into how to use a hand planer effectively, step-by-step.
How to Use a Hand Planer
1. What Is a Hand Planer?
A hand planer is a traditional woodworking tool used to flatten or smooth surfaces of wood, remove rough spots, and adjust the thickness of boards. Unlike power planers, which are electric, the hand planer requires manual effort, giving the woodworker precise control over the material’s shape and finish. Hand planers have been used for centuries and remain indispensable in fine woodworking.
2. Types of Hand Planers
While hand planers all serve the same fundamental purpose, different types are designed for specific tasks:
- Block Planes: Ideal for smaller, detailed work like trimming end grain or smoothing narrow edges.
- Jack Planes: A versatile, mid-sized option, typically used for initial smoothing and general flattening tasks.
- Jointer Planes: Longer planes used for flattening large surfaces and edges to ensure a straight, even cut.
- Smoothing Planes: Smaller, more precise, these are great for giving a final, polished finish to your workpiece.
- Rabbet Planes: Designed to cut precise grooves and rabbets (step-like cuts along the edge of a board).
Understanding which type of hand planer suits your project is the first step toward achieving professional results.
3. Essential Parts of a Hand Planer
To use a hand planer effectively, it’s crucial to familiarize yourself with its parts:
- Sole: The flat bottom surface that glides over the wood.
- Iron (Blade): The cutting component responsible for shaving wood.
- Cap Iron: Sits on top of the blade and helps control wood shavings.
- Frog: The part that holds the blade in place, ensuring stability.
- Adjusting Knob: Controls the depth of the blade.
- Handles (Front and Rear): Used to guide and apply pressure during use.
Each of these parts plays a critical role in the planer’s performance. Regular inspection and maintenance of these components are essential for consistent results.
4. Why Use a Hand Planer Over a Power Planer?
You might wonder why anyone would use a hand planer when power planers can get the job done faster. Here are some reasons why hand planers still hold value:
- Precision: Hand planers allow for finer, more controlled cuts. They are ideal for delicate woodworking where over-sanding or excessive removal of material would ruin the project.
- No Tear-Out: Hand planers are gentler on the wood, reducing the risk of tear-out, especially when working with difficult grain patterns.
- Portability: No need for electricity or batteries, making hand planers perfect for on-site adjustments.
- Skill Development: Using a hand planer hones your woodworking skills, teaching you to work with the wood, not just remove material.
5. How to Prepare the Hand Planer for Use
Before diving into your woodworking project, it’s essential to ensure your hand planer is properly set up:
- Inspect the Blade: Ensure the blade is sharp and free from nicks. A dull blade will tear the wood instead of shaving it smoothly.
- Set the Blade Depth: Use the adjusting knob to control how much material the blade will remove. For fine smoothing, a shallower depth is recommended.
- Check the Cap Iron: The cap iron should be tightly secured, and positioned close to the cutting edge to ensure smooth shavings.
- Test on Scrap Wood: Before working on your actual piece, test the planer on a piece of scrap wood to ensure it’s set correctly.
6. Step-by-Step Guide on How to Use a Hand Planer
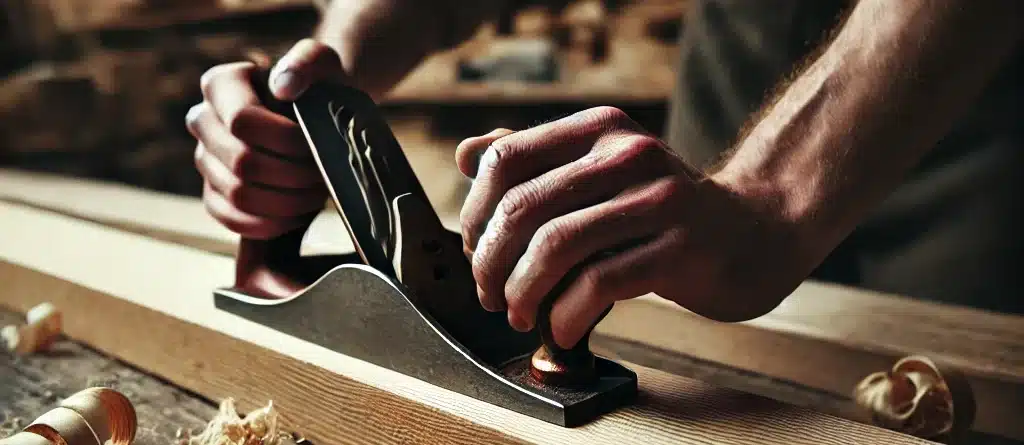
Using a hand planer correctly requires technique and patience. Follow these steps to achieve a smooth and even surface:
Step 1: Secure Your Workpiece
Before starting, clamp your wood securely to your workbench. This prevents any unwanted movement during the planing process.
Step 2: Position Yourself Properly
Stand with your feet shoulder-width apart. Your stance should allow you to move smoothly with the planer from one end of the board to the other.
Step 3: Align the Planer
Place the planer at the edge of the wood, ensuring the blade is positioned straight across the grain. Tilt the planer slightly forward so only the front touches the wood at first.
Step 4: Apply Even Pressure
Push the planer forward with a smooth motion, applying even pressure on the front handle. As you move along the board, shift pressure to the rear handle to keep the blade flat against the wood.
Step 5: Check Your Progress
After a few passes, check the surface for flatness and smoothness. Adjust the blade depth if necessary, and continue until you achieve the desired result.
7. Techniques for Different Tasks with a Hand Planer
Different woodworking tasks require different approaches when using a hand planer:
- Flattening a Surface: Start with diagonal passes, then finish with passes along the grain to ensure an even surface.
- Smoothing Edges: Use a block plane for precision when working on narrow edges or end grain.
- Removing Twist: If your board has a twist, plane high spots down gradually, alternating between opposite corners.
8. Safety Tips When Using a Hand Planer
While hand planers may seem harmless compared to power tools, they still pose risks if not used properly:
- Sharp Blades: Always be mindful of the sharp blade, and avoid touching the cutting edge.
- Stability: Ensure your workpiece is securely clamped to prevent slipping.
- Proper Posture: Keep a stable stance to avoid losing balance or control over the tool.
- Blade Adjustment: When adjusting the blade, make sure the planer is on a stable surface to avoid accidents.
9. Common Mistakes and How to Avoid Them
Here are some typical errors woodworkers make when using a hand planer and how to prevent them:
- Over-Planing: Removing too much material can ruin a piece. Check your progress frequently and take light passes.
- Uneven Pressure: Applying too much pressure on one side can result in an uneven surface. Keep your pressure balanced.
- Working Against the Grain: Planing against the grain can cause tear-out. Always try to work with the grain.
10. Maintenance: How to Keep Your Hand Planer in Top Shape
Proper maintenance ensures that your hand planer performs well for years to come:
- Sharpen the Blade: Regularly sharpen the blade using a honing stone to maintain a clean, precise cut.
- Clean the Sole: Wipe down the sole after use to prevent rust and buildup of debris.
- Lubricate Moving Parts: Keep the adjustment mechanisms smooth by applying a light oil occasionally.
- Store Properly: Store your hand planer in a dry, safe place, preferably in a toolbox, to avoid damage.
11. FAQs About How to Use a Hand Planer
Q1: How often should I sharpen my hand planer blade?
It’s best to sharpen the blade whenever you notice it’s not cutting as smoothly. For frequent users, sharpening every few projects is ideal.
Q2: Can a hand planer be used on hardwood?
Yes, but hardwoods may require a sharper blade and more effort to plane smoothly.
Q3: What’s the difference between a block plane and a jack plane?
Block planes are smaller and used for fine detail work, while jack planes are larger and more versatile for general-purpose smoothing.
Q4: Why is my hand planer leaving marks on the wood?
Marks can result from a dull blade, uneven pressure, or planing against the grain.
Q5: Can I use a hand planer to remove paint?
While possible, it’s not ideal. Paint can dull the blade quickly. It’s better to remove paint with a scraper or chemical stripper.
Q6: How do I prevent tear-out when using a hand planer?
Always plane with the grain and take lighter passes to avoid tearing the wood.
12. Conclusion
Using a hand planer is a skill every woodworker should master. While it may take time to perfect, the results are well worth the effort. By following the techniques and tips outlined in this guide, you’ll be able to achieve smooth, flat surfaces with precision and control. Whether you’re crafting furniture, building
Contact Us today to for us to Assist with your next project or furniture build.